

Setting up Anki
Anki is the best way to study vocabulary that I’ve ever found, and I’ve done some looking. If you want to develop your Icelandic vocab as fast and efficiently as possible, it’s the way to go.
Let me walk you through setting up your Anki.
Device Choice
You can use Anki
- on your computer
- in your browser
- on your smartphone
Your choice of device doesn’t make a huge difference. Just use whatever suits you best.
Perhaps your only chance to review vocabulary is on the bus, so the mobile app is the only option, or you don’t own a smartphone, so you have to use a laptop.
If you have the luxury of choice, I’d recommend using a desktop computer. Typing is faster so adding new words is quicker, and it also makes typing your answer (rather than just saying it out loud) more viable, which is good for more advanced learners.
Desktop Computer
To download Anki, go here: https://apps.ankiweb.net/. Then click download and simply follow the step-by-step instructions.
Options
These are the options that I use personally and that I recommend to my students. Feel free to experiment with other settings if you want.
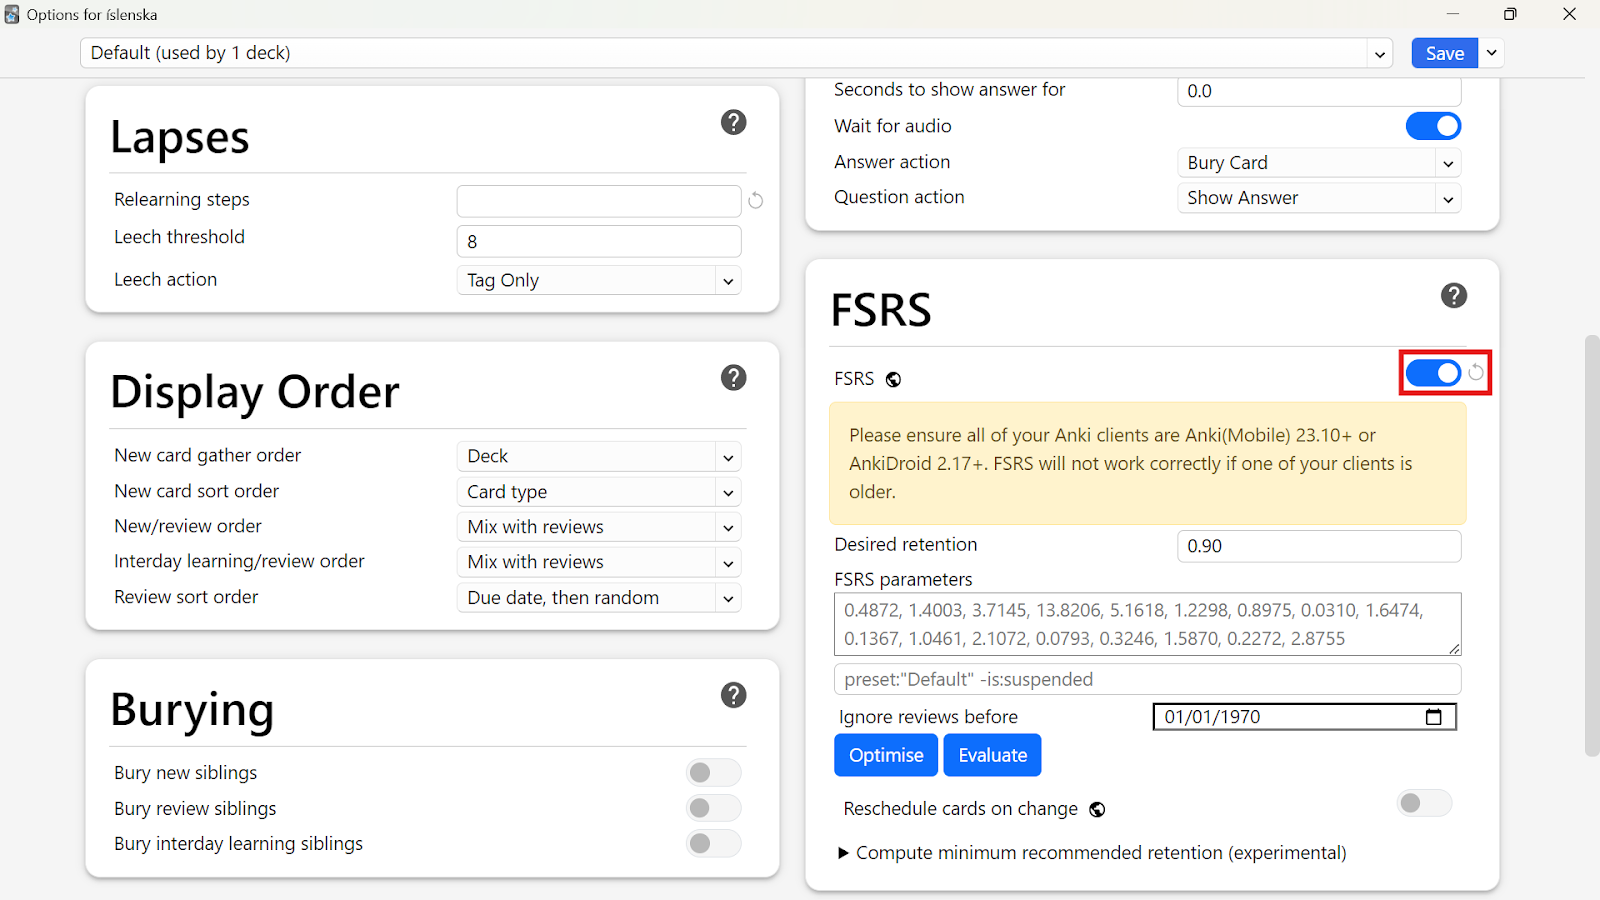
To get to the options window, click the cogwheel to the right of the screen, then click options.

I recommend enabling FSRS, circled in red in the pictures below.
If you’re curious, FSRS stands for Free Spaced Repetition Schedule. It’s essentially the next-generation of spaced repetition algorithms, and in future versions of Anki it’ll certainly be enabled by default. For backward compatibility reasons it’s currently an optional setting.

Don’t forget to hit the blue save button after you change the settings, or all will be for naught.
Syncing With Another Device
If you want to go back and forth between your desktop and phone, you can easily sync your Anki: simply click sync at the top right.

The first time you do this, you’ll be prompted to make an AnkiWeb account. Do so. Now, when you open or close your Anki on any device, it will sync with your AnkiWeb, making a seamless transition between computer and phone.
Mobile App
Anki is open source, so there are a lot of knock-offs out there. Here’s what the Anki logo looks like: if you’re looking at an app with a different logo, it’s a knock-off.

Android vs. iPhone (and Secret Options #3 and #4)
The Anki app is free on Android, but pricey on iPhone - $25 for lifetime access, last I checked. If you have the money to burn, it’s worth it.
If you don’t have the money to burn (or just don’t like burning your money) you can use secret option #3: just use Anki in the browser of your iphone at Anki Web. It doesn’t have ALL the functionality of the app, but it absolutely gets the job done.
Secret option #4 is to use a knock-off app. Anki is open-source, so there’s really no reason a knock-off shouldn’t be a perfectly acceptable alternative. Those will be called “Anki-something”, but with a different image than the “real” Anki app.
Here, I’ll walk you through setting up the Android app step-by-step. If you have the iphone app, all the same principles apply: only the interface looks different.
Go ahead and download the Anki app for your device. Searching “Anki” should do the trick; just make sure you have the right logo (unless you want to try out one of the knock-offs).
Options
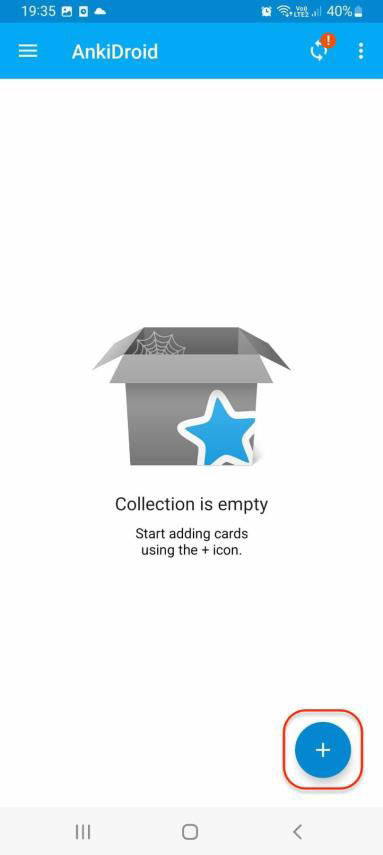
We need to edit the options of our deck, so our first order of business is to add a deck.
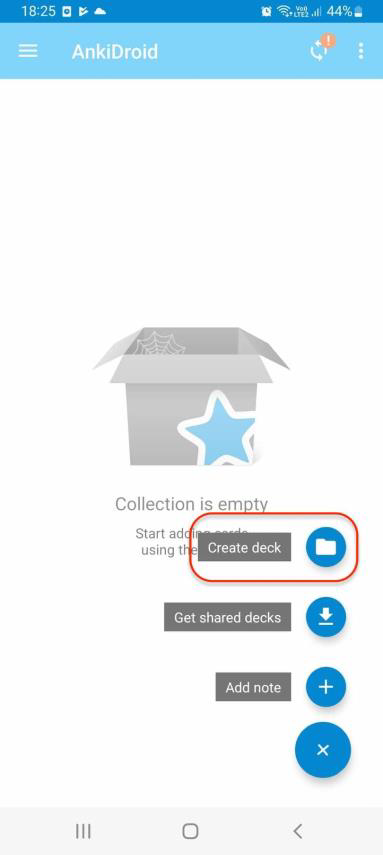
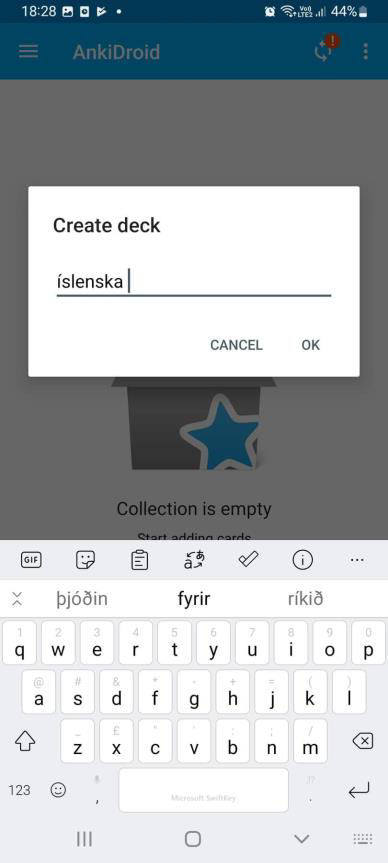
Tap the blue plus in the bottom right corner, then tap “create deck”, and name your deck “íslenska”. It’s classy to use the language you’re learning.
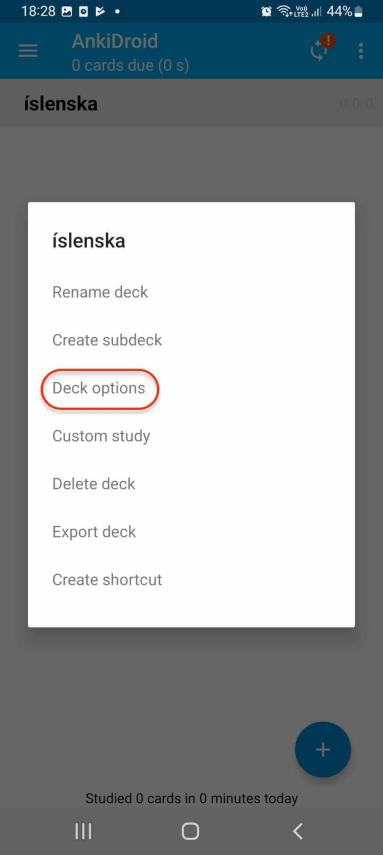
Then, on the main screen, hold down the deck “íslenska” to access the options. Then tap deck options.

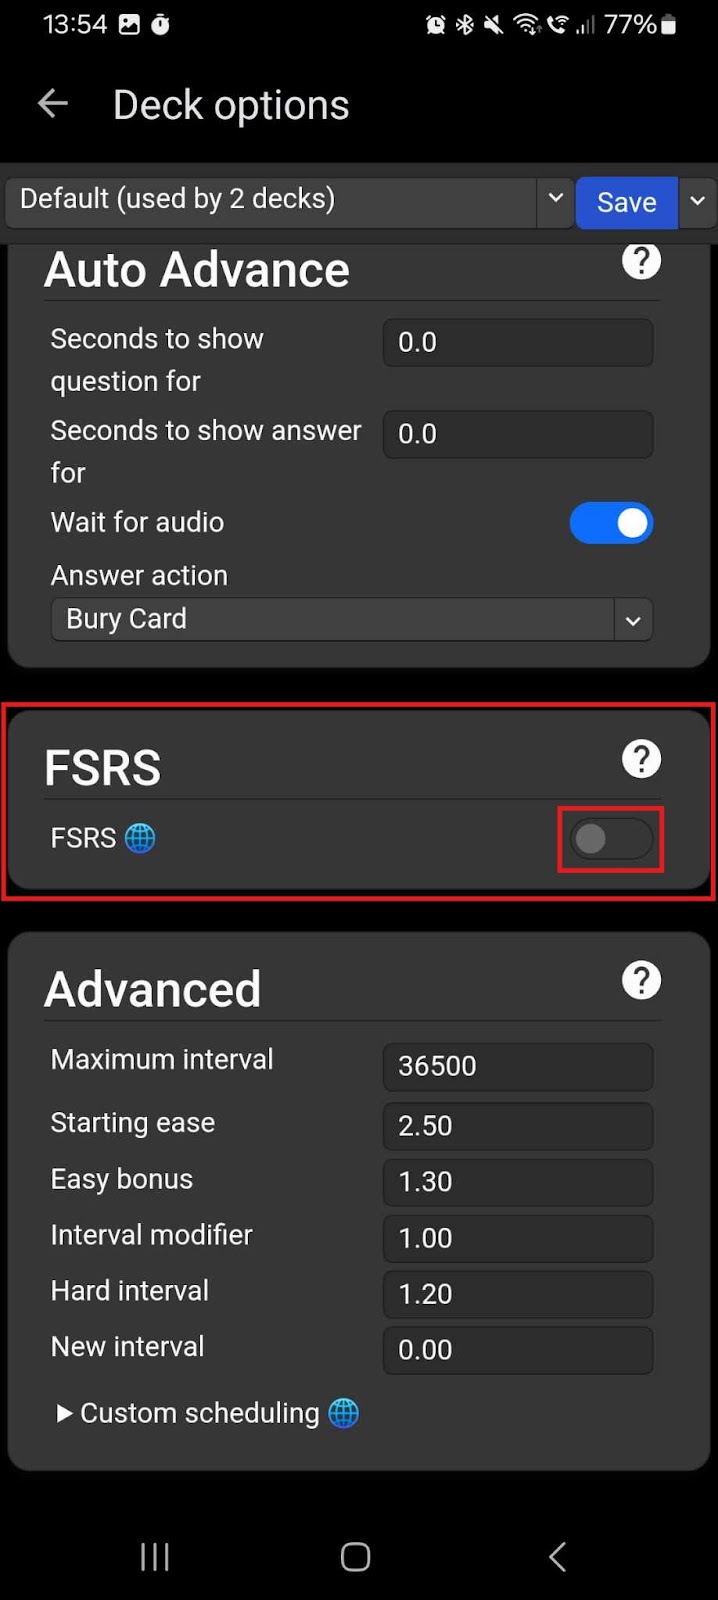
I recommend enabling FSRS, circled in red in the pictures below.
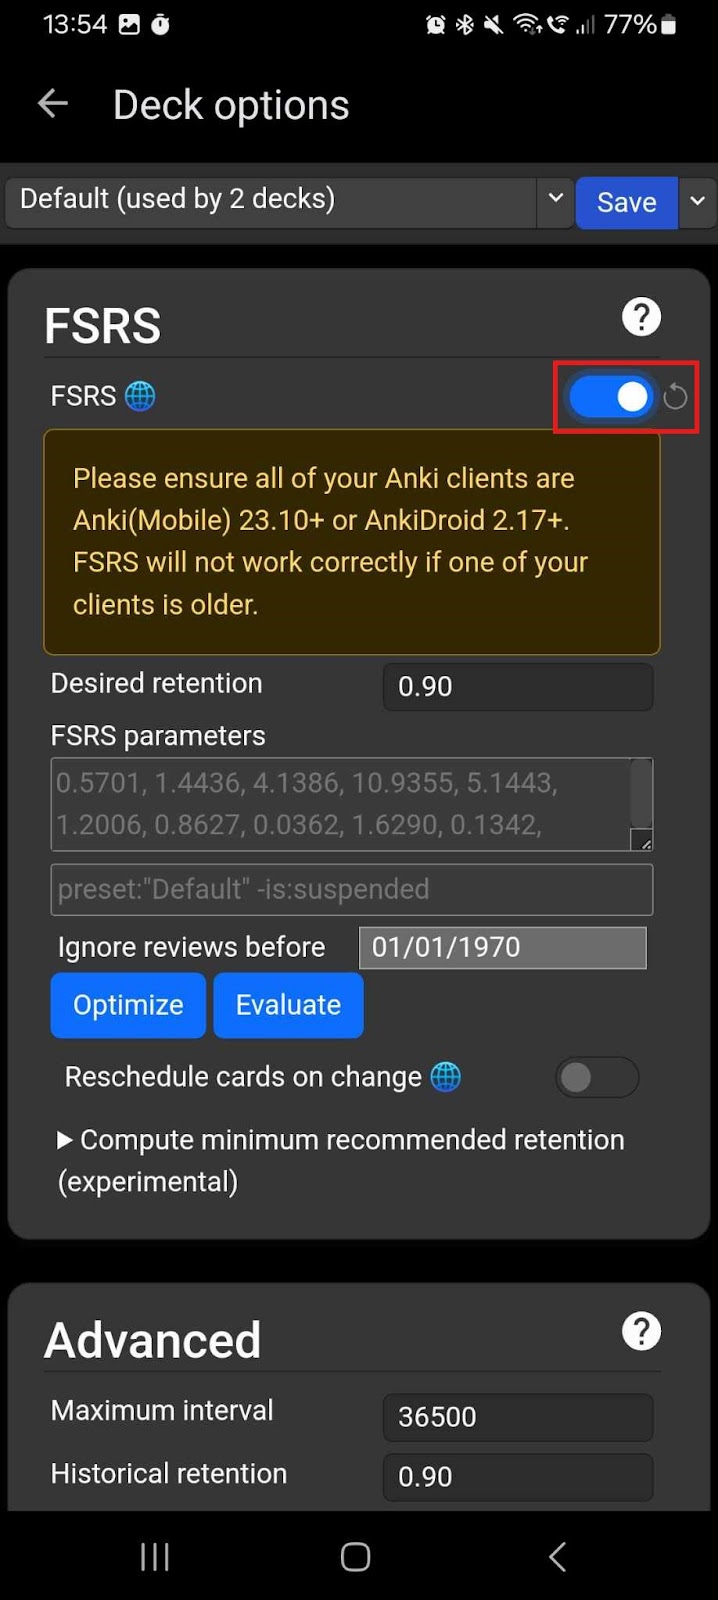
Hit that blue save button, and that’s it! You’re all set up.
Syncing With Another Device
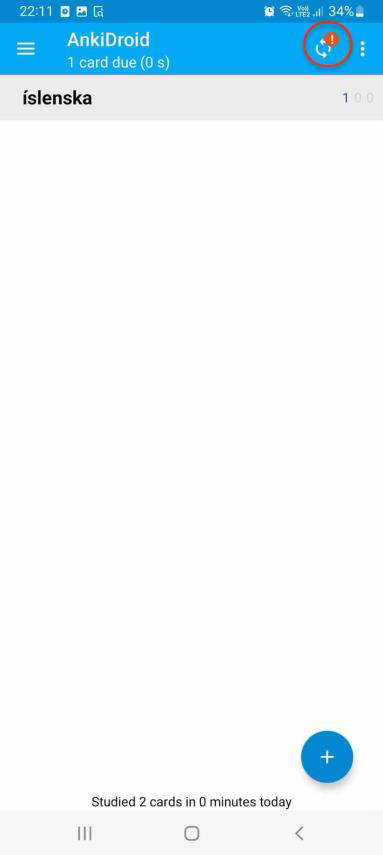
If you want to go back and forth between your desktop and phone, you can easily sync your Anki: simply tap the sync button at the top right.
The first time you do this, you’ll be prompted to make an AnkiWeb account. Do so. Now, when you open or close your Anki on any device, it will sync with your AnkiWeb, making a seamless transition between devices.
Next Steps
Now that you’ve got your Anki just the way we like it, it’s time to start adding some words in there to learn!
Related reading
If you found this interesting, you might also be interested in these articles.


